
Hello everyone,
today I would like to show you another technique called
masking. This tutorial was made for Paperoamo.
Prajem krásny deň,
tento mesiac som na Paperoamo dostala významnú úlohu
predstaviť vám techniku mesiaca. Rozhodla som sa predstaviť vám maskovanie.
Drahí slovenskí a českí priatelia, celý postup si môžete prečítať na TOMTO ODKAZE. Vopred ďakujem za vaše lajky a
milé komentáre.
Build-up stamps are so popular these days and they
are so amazing. Unfortunately if you use them traditional way you won´t achieve
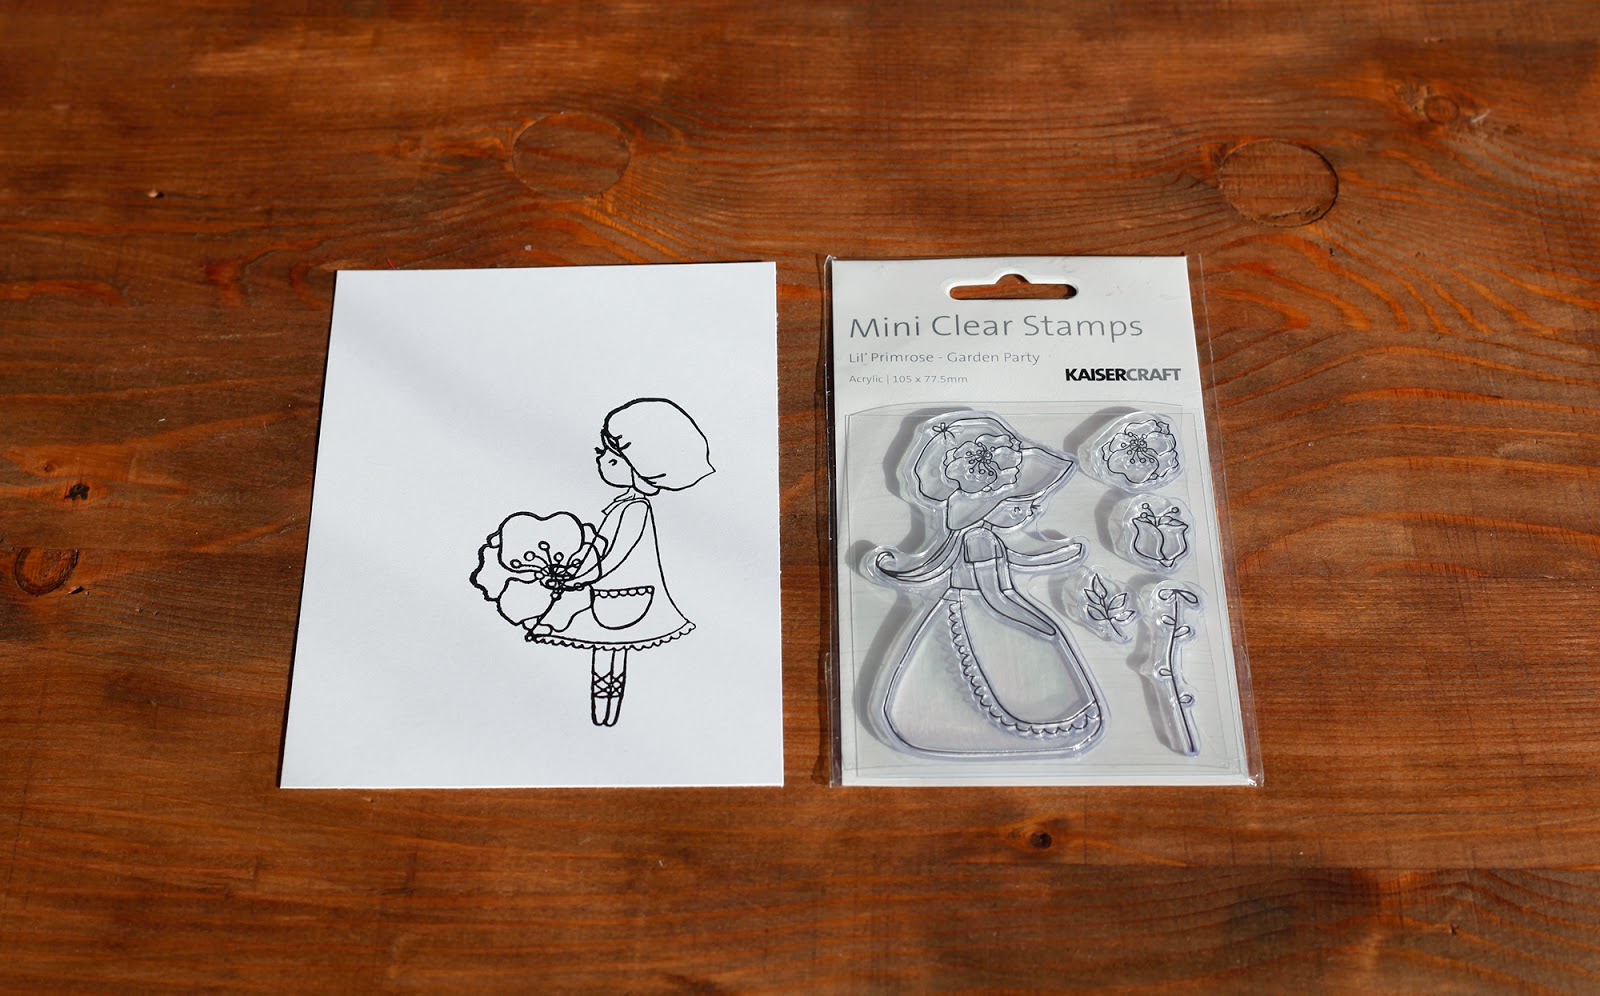
the desire look. For the demonstration purposes I decided to use the stamps
from Kaisercraft. Normally you would first stamp the girl and then
the flower which she holds in her hands. What happens is that the lines overlay
and the result is terrible as you can see on the picture.
That´s the
time when the masking solves all your problems. The key of this technique is to
stamp backwards - first you stamp the main picture (focal point of your postcard) and then you
stamp all the other motives. It may seem a little bit confusing but trust
me - it´s easy and I´ll show you the
whole procedure.
What do you
need for this project ?
The basic &
the most important supply is the masking paper. There are several
possibilities:
1. special
masking paper - the sheet of paper is covered with special adhesive that won´t
tear your paper or damage the stamped image. There are several sizes and
companies producing these papers.
2. you can
use the regular post-it notes. I have discovered in my stationary / office
supplies store post it notes which have 80% adhesive coverage. They are
perfect. Try to look for something similar.
3. you can
use regular sheet of paper and use removable adhesive.
Of course
you need some stamps and ink pads. Depends on your personal preference if you
prefer to colour your image with markers ( and use traditional cardstock) or
you will use the watercolours ( in that case you will need watercolour
cardstock as well).

1. First
you need to think about your card and its final design. My main motive will be
the flower so I stamp the flower as the first one. I stamp the flower on my masking paper as
well.


3. Finish
the scene on your postcard and stamp the girl.


We will need again the same supplies: some stamp, masking paper and horizon. I used the Inkadikado stamping mask paper because it´s bigger and it was very comfortable but you can create the scene with regular paper as well. I created the curve with pencil and cut it out.
4. Unstick
the masking flower and you will discover a beautiful picture where everything
is right and correct :-)
5. I would
like to prove you that this technique has unlimited possibilities of use.
That´s why I am going to show you the way how to create a scene with focus on
your background using masking.
We will need again the same supplies: some stamp, masking paper and horizon. I used the Inkadikado stamping mask paper because it´s bigger and it was very comfortable but you can create the scene with regular paper as well. I created the curve with pencil and cut it out.

6.
Procedure is the same: stamp the fox on the paper, stamp the fox on the masking
paper and prepare your horizon.

7. First
stick down the fox, then the horizon. Now we can start to create our
background. I used the Distress Ink Pads and apply the colours with Mini Ink
Blending Tools.

8. When I
was satisfied with my background, I peel
off my horizon masking paper. As you can see we have a beautiful background. I
left the masking paper on the fox because I continued to create an illusion of
snowing on my background. Gradually I did some splatters of water, colours,
inks .. whatever to create nice snowing around our little foxy lady :-)

9. When you
are satisfied with your background, just peel off the masking paper from the
fox and begin with the fun part - colouring :-)

Let me
present you the final masterpieces :-)))


Advantages
of this technique:
- the
principle is very simple
- the
procedure might be a little bit longer than usual but nothing terrible :-)
- you can
create amazing scenes and backgrounds
-
especially suitable for those who love to colour the images on your postcards
I would
like to point out that you can use special masking fluid and cover the images
with it. You can buy it in art stores and it is used with watercolouring. It´s
topic for another tutorial :-) I mention it in case you have it at home and
want to use it.
My final
advise: wait until your ink dry and then move to another step in your procedure
because your images can smirch or smudge. I know what I´m talking about - this
is the reason why the girl on my card is holding two flowers in the end :-)
I hope you
like this technique and you will give it a try. Let me know how do you like it
:-)
No comments:
Post a Comment